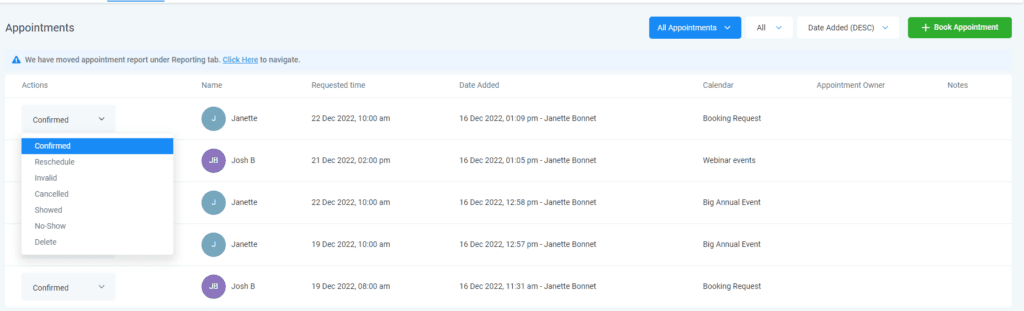
With BrokerOS, you have complete control over your bookings. You can add, edit, or delete appointments as needed. You can manually update the status to track if appointments were completed, rescheduled, or a no-show.
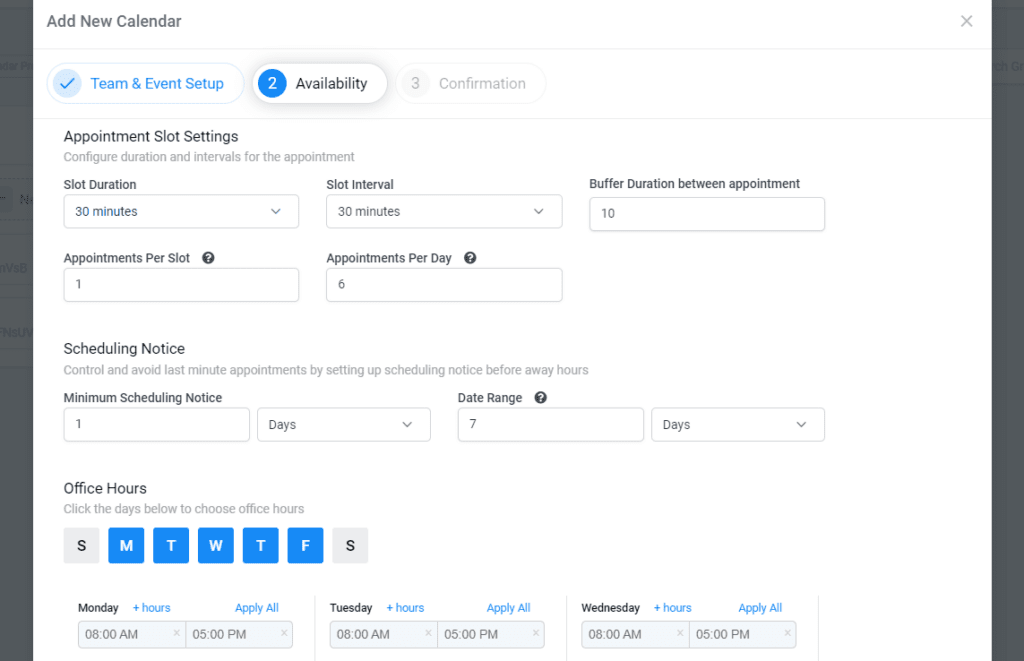
You can set parameters such as slot duration, interval, buffer duration, appointments per slot and per day, scheduling notice and office hours to avoid overbooking.
You can customize your availability depending on your workload and preferences.
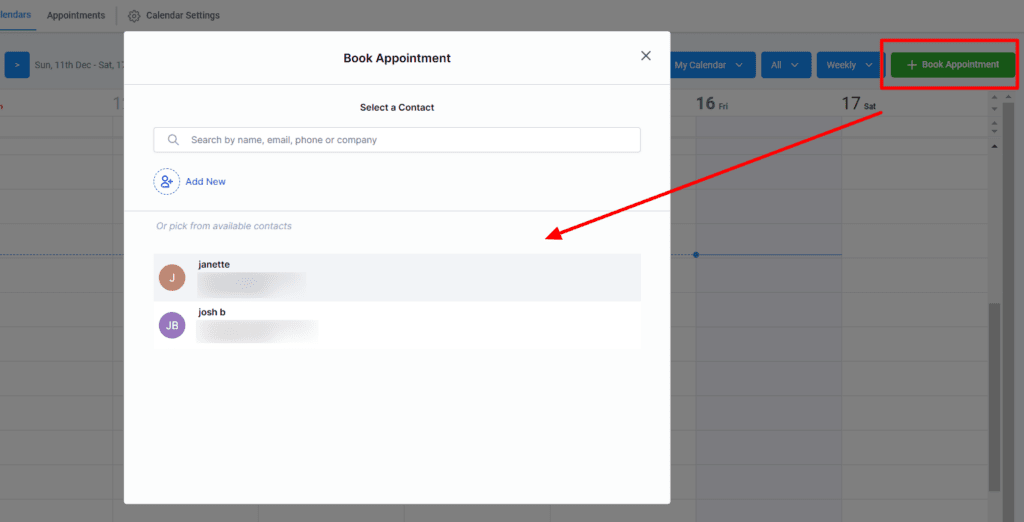
You can manually add your client's appointments by clicking "Book Appointment". You can select the contact and add new contacts if needed. Choose the relevant calendar from a dropdown box to keep everything organized.
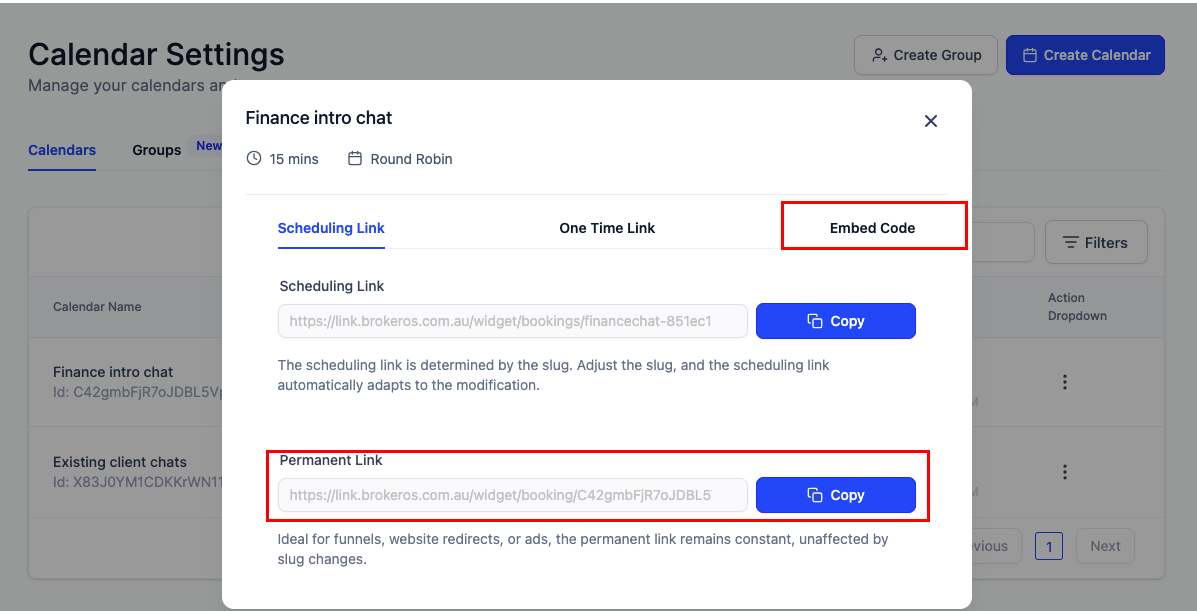
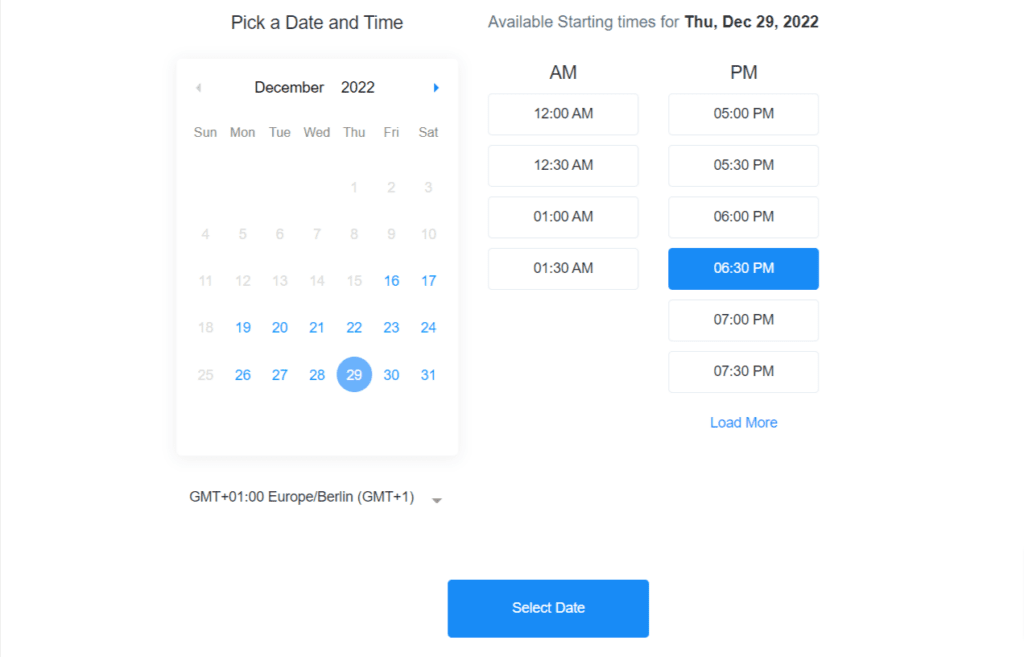
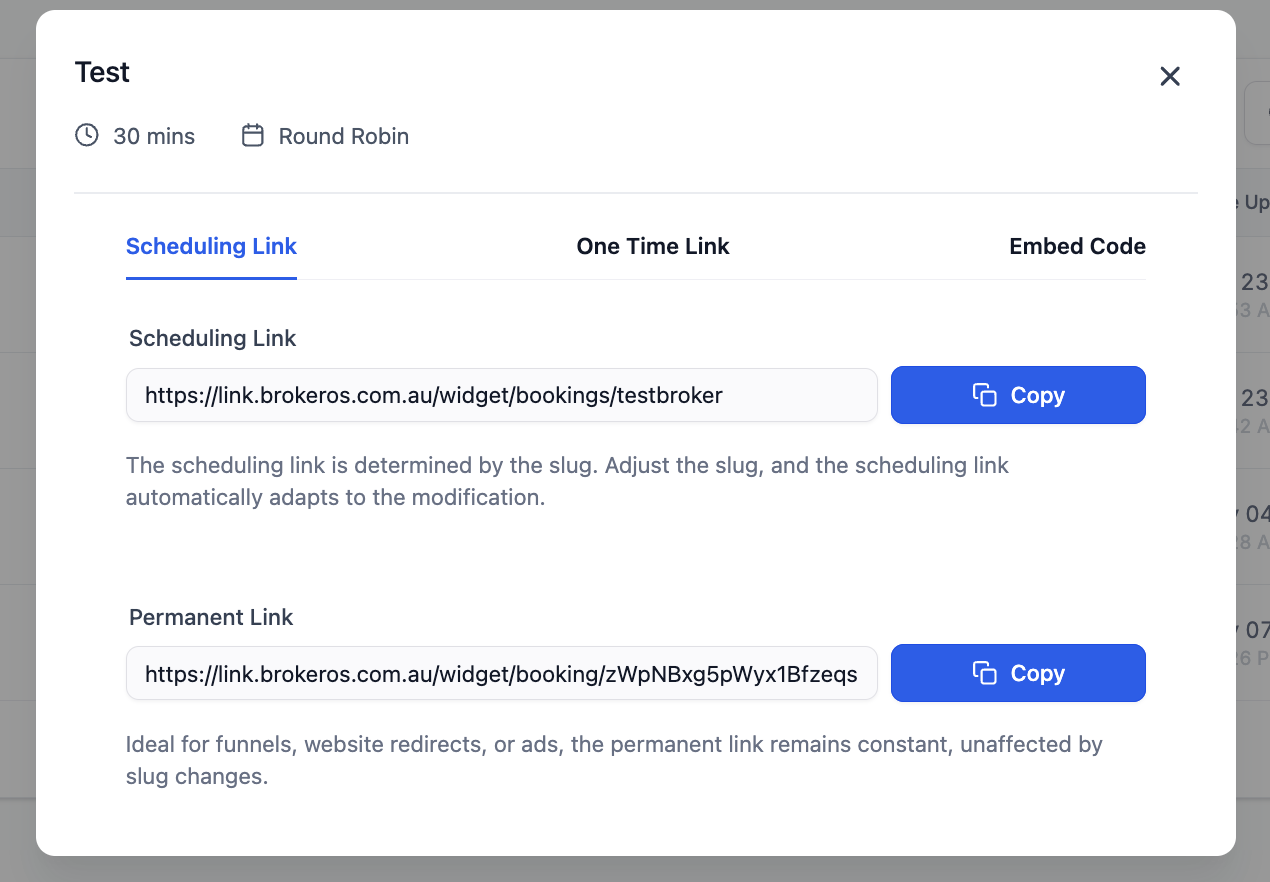
Each calendar has a unique widget link that you can use to embed it on your website, landing page, or sales funnel. The widget displays available slots in various languages, and once booked, the information seamlessly appears in your calendar.
From the Dashboard, navigate to the Calendars tab under Settings.
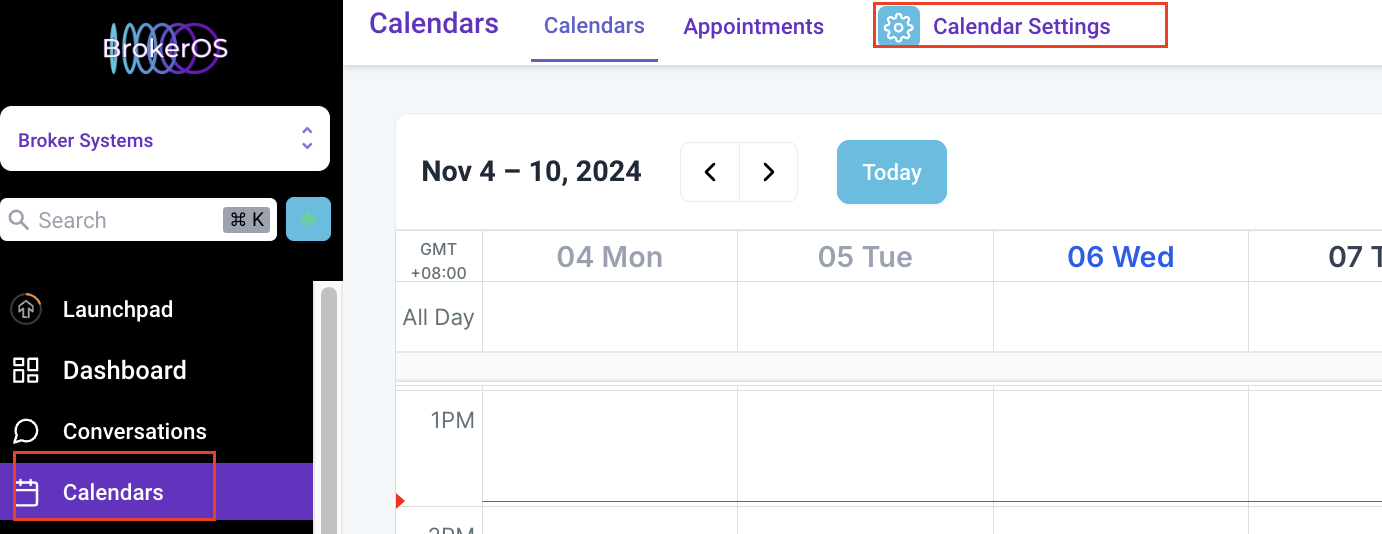
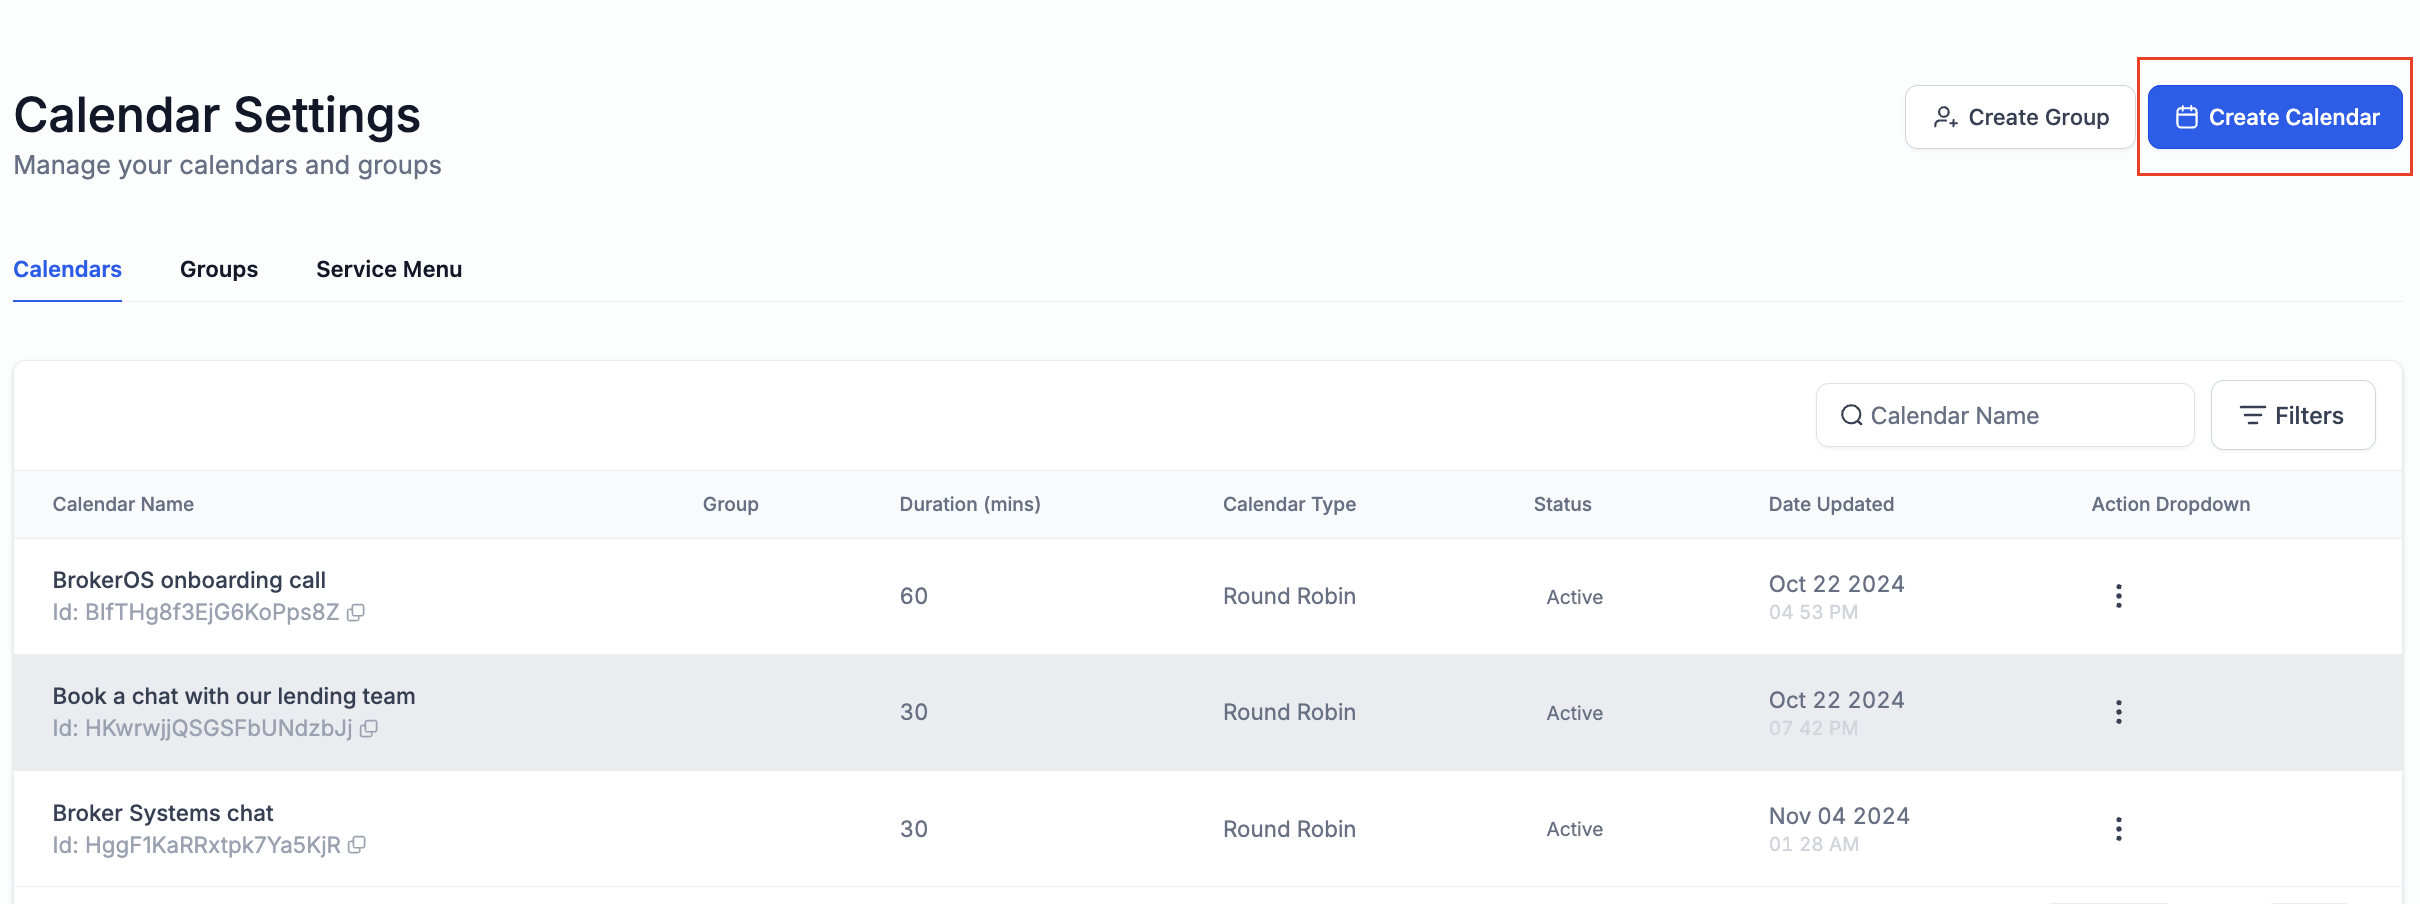
Click on New Calendar to create a new booking calendar.
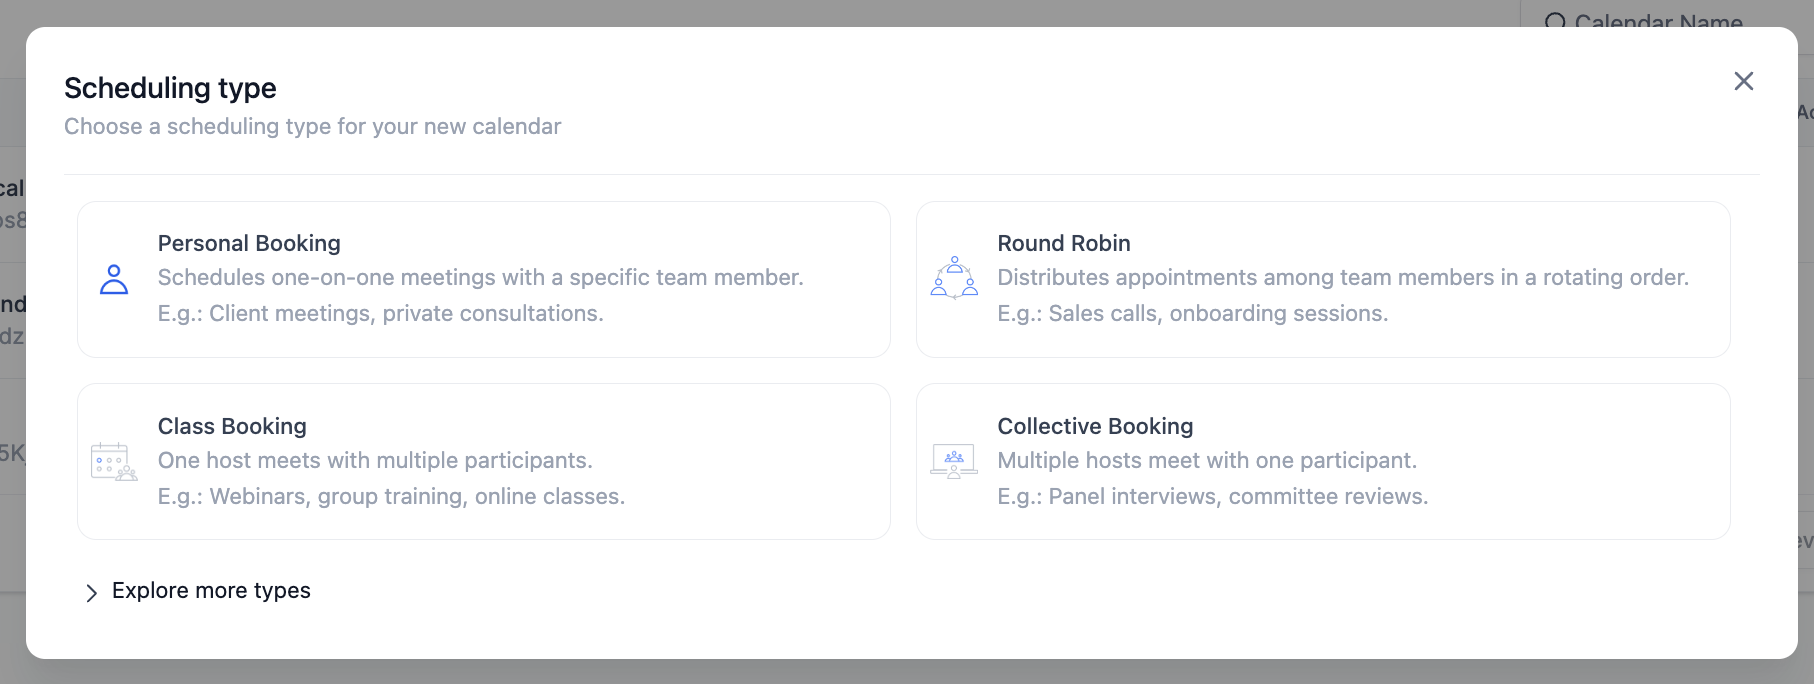
One-on-One Calendar: Used for individual appointments between you and a client. Ideal for consultations, meetings, or personal sessions.
Group Calendar: Allows multiple clients to book the same time slot. Perfect for workshops, group training, or events where many people can attend simultaneously.
Round Robin Calendar: Distributes appointments evenly across multiple team members. Great for teams that handle client bookings, ensuring balanced workloads.
Multi-Provider Calendar: Useful when you have different services or providers (e.g., consultants, therapists) and need to assign bookings based on service type or provider availability.
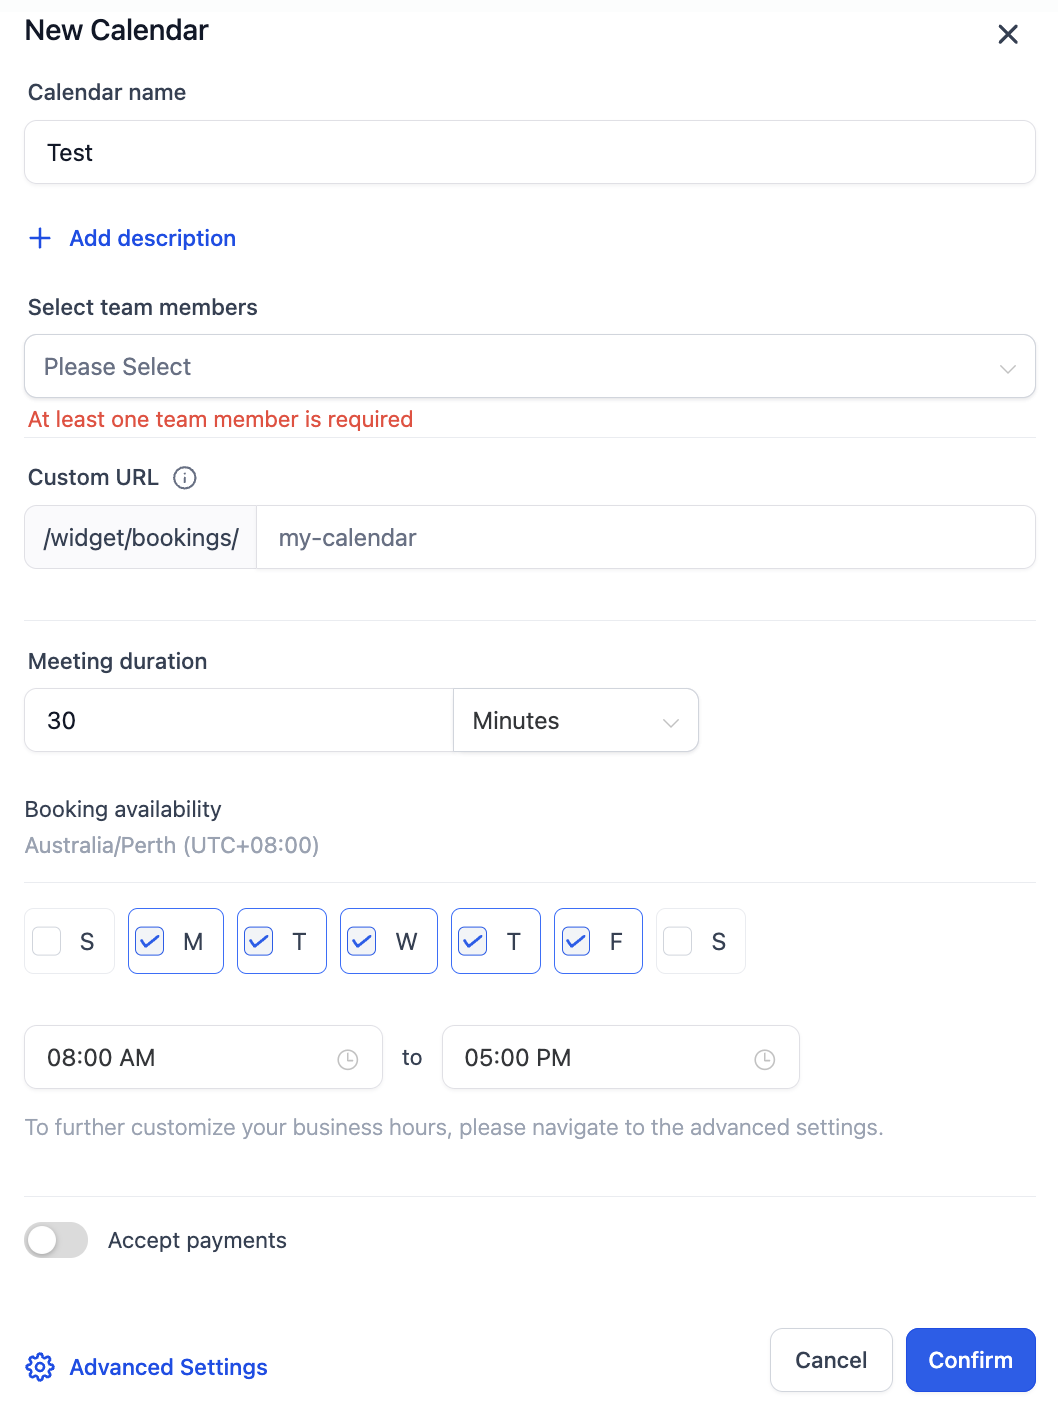
Name Your Calendar: Enter a name that reflects the purpose of this calendar (e.g., “Consultation Appointments”).
Assign a Description (optional): Provide a brief description for internal reference or user guidance.
Add custom URL. Customize the direct link to the calendar
Adjust meeting duration.
Set Booking Availability.
Click Confirm.
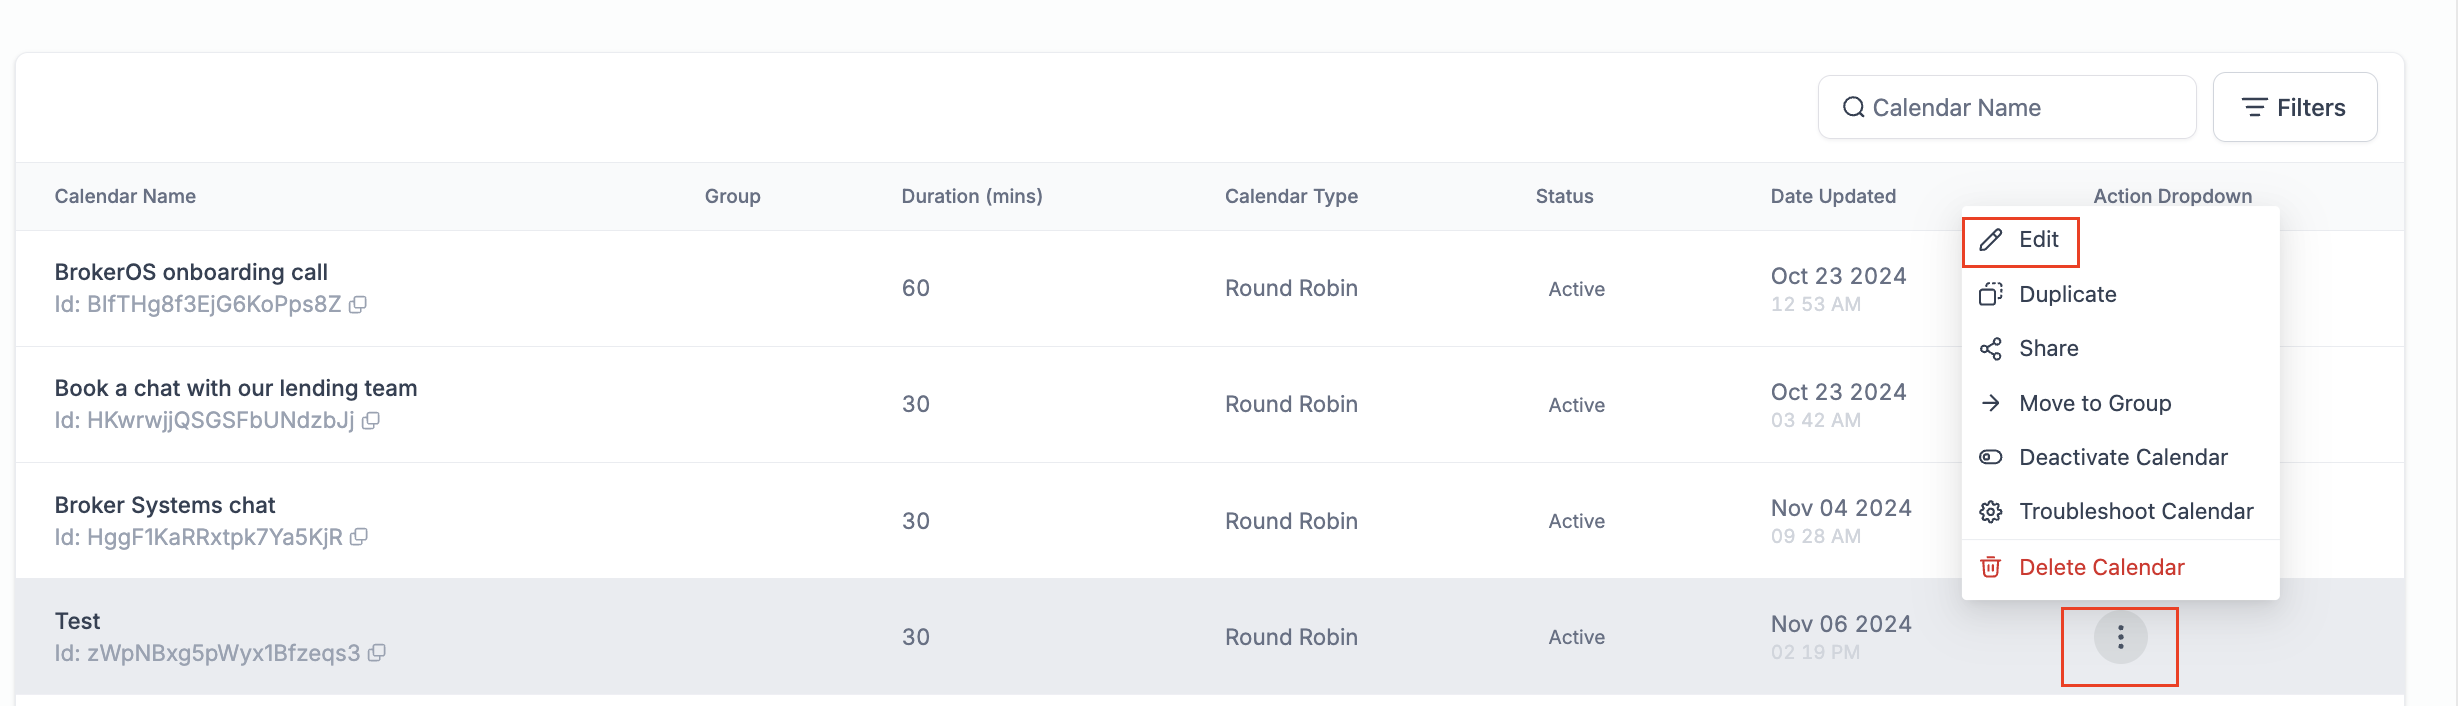
To do so, edit your calendar.
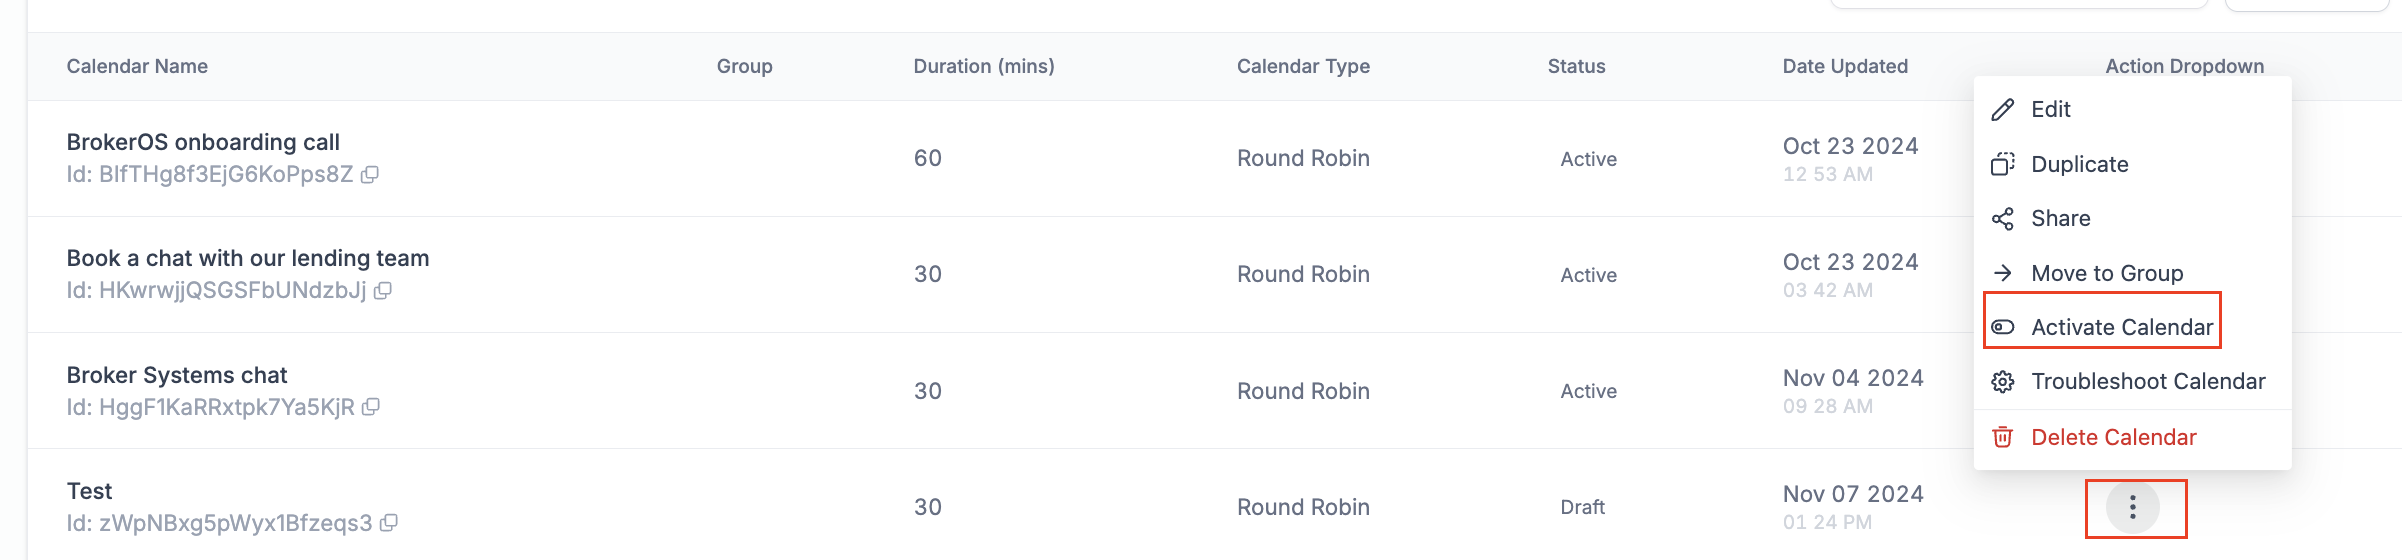
Select the calendar you wish to edit, click the 3 dots
Select edit.
Upload your logo. Max dimensions 180 x 180 px | max size 2.5 mb.
Edit the calendar description. It is a brief overview of the purpose or details of the calendar. This description is visible to clients when they book appointments and can include information like session goals, prerequisites, or any relevant instructions.
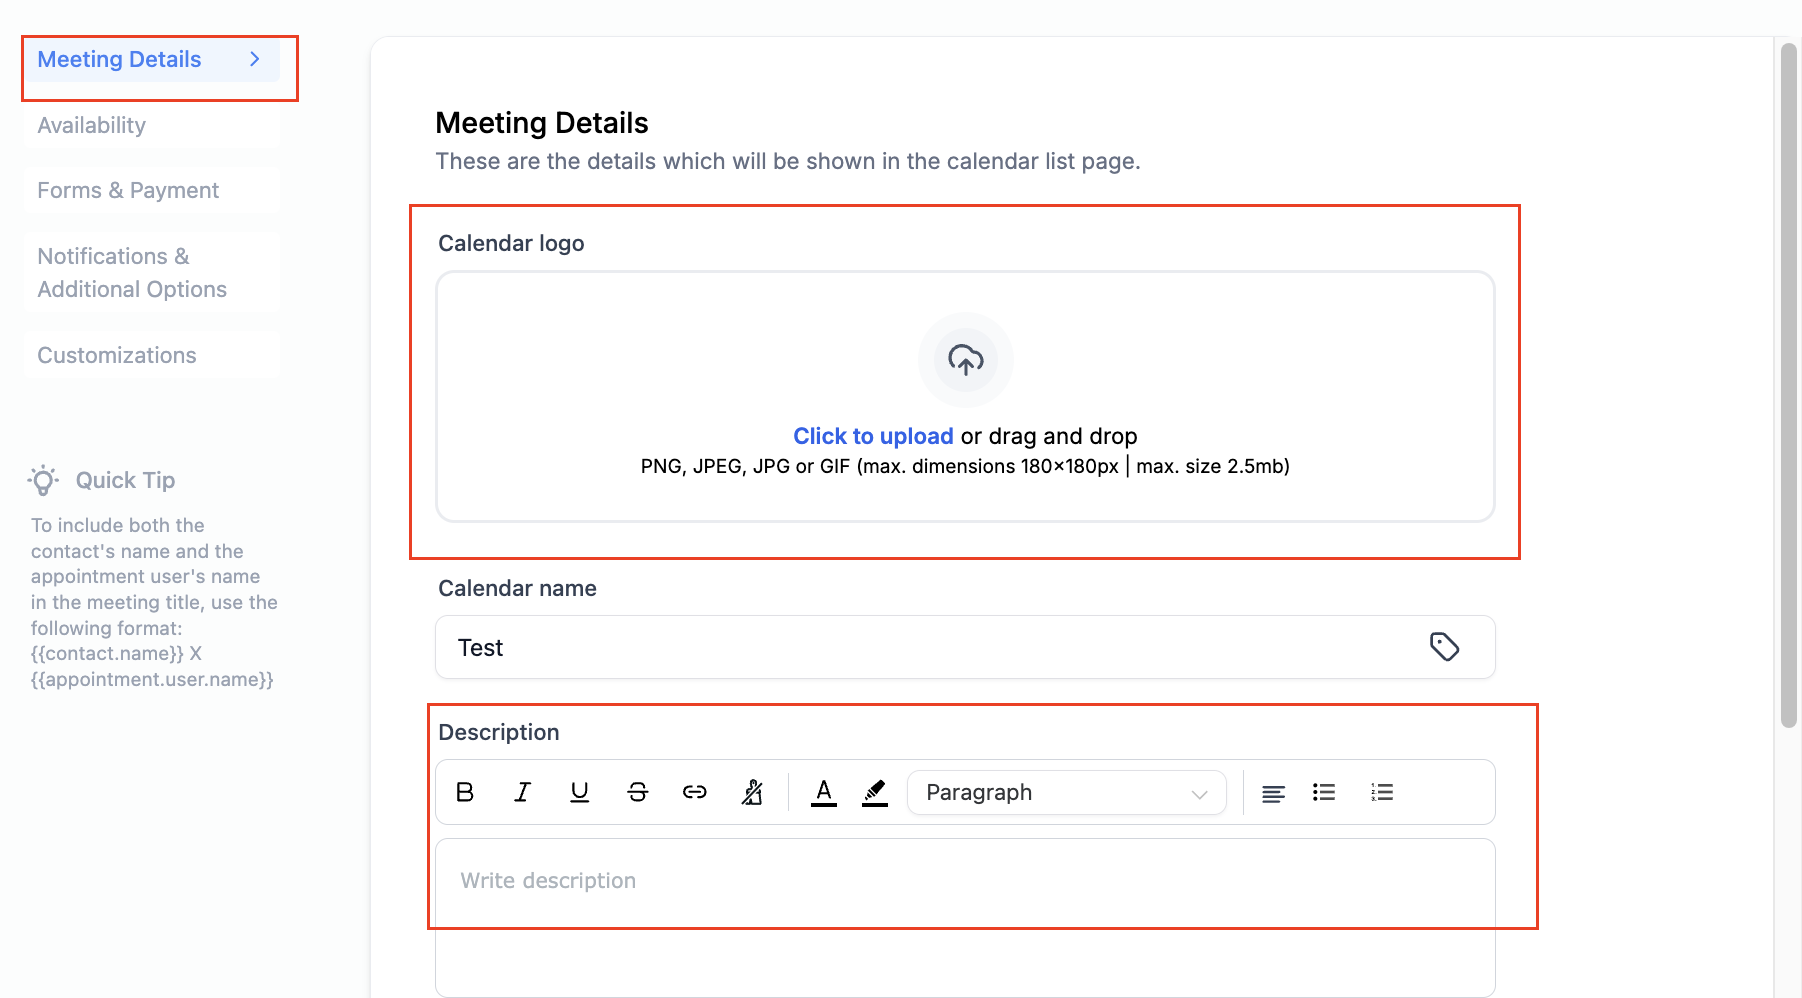
Hit Save.
Further customize your availability:
Define your working hours and the days when appointments can be scheduled.
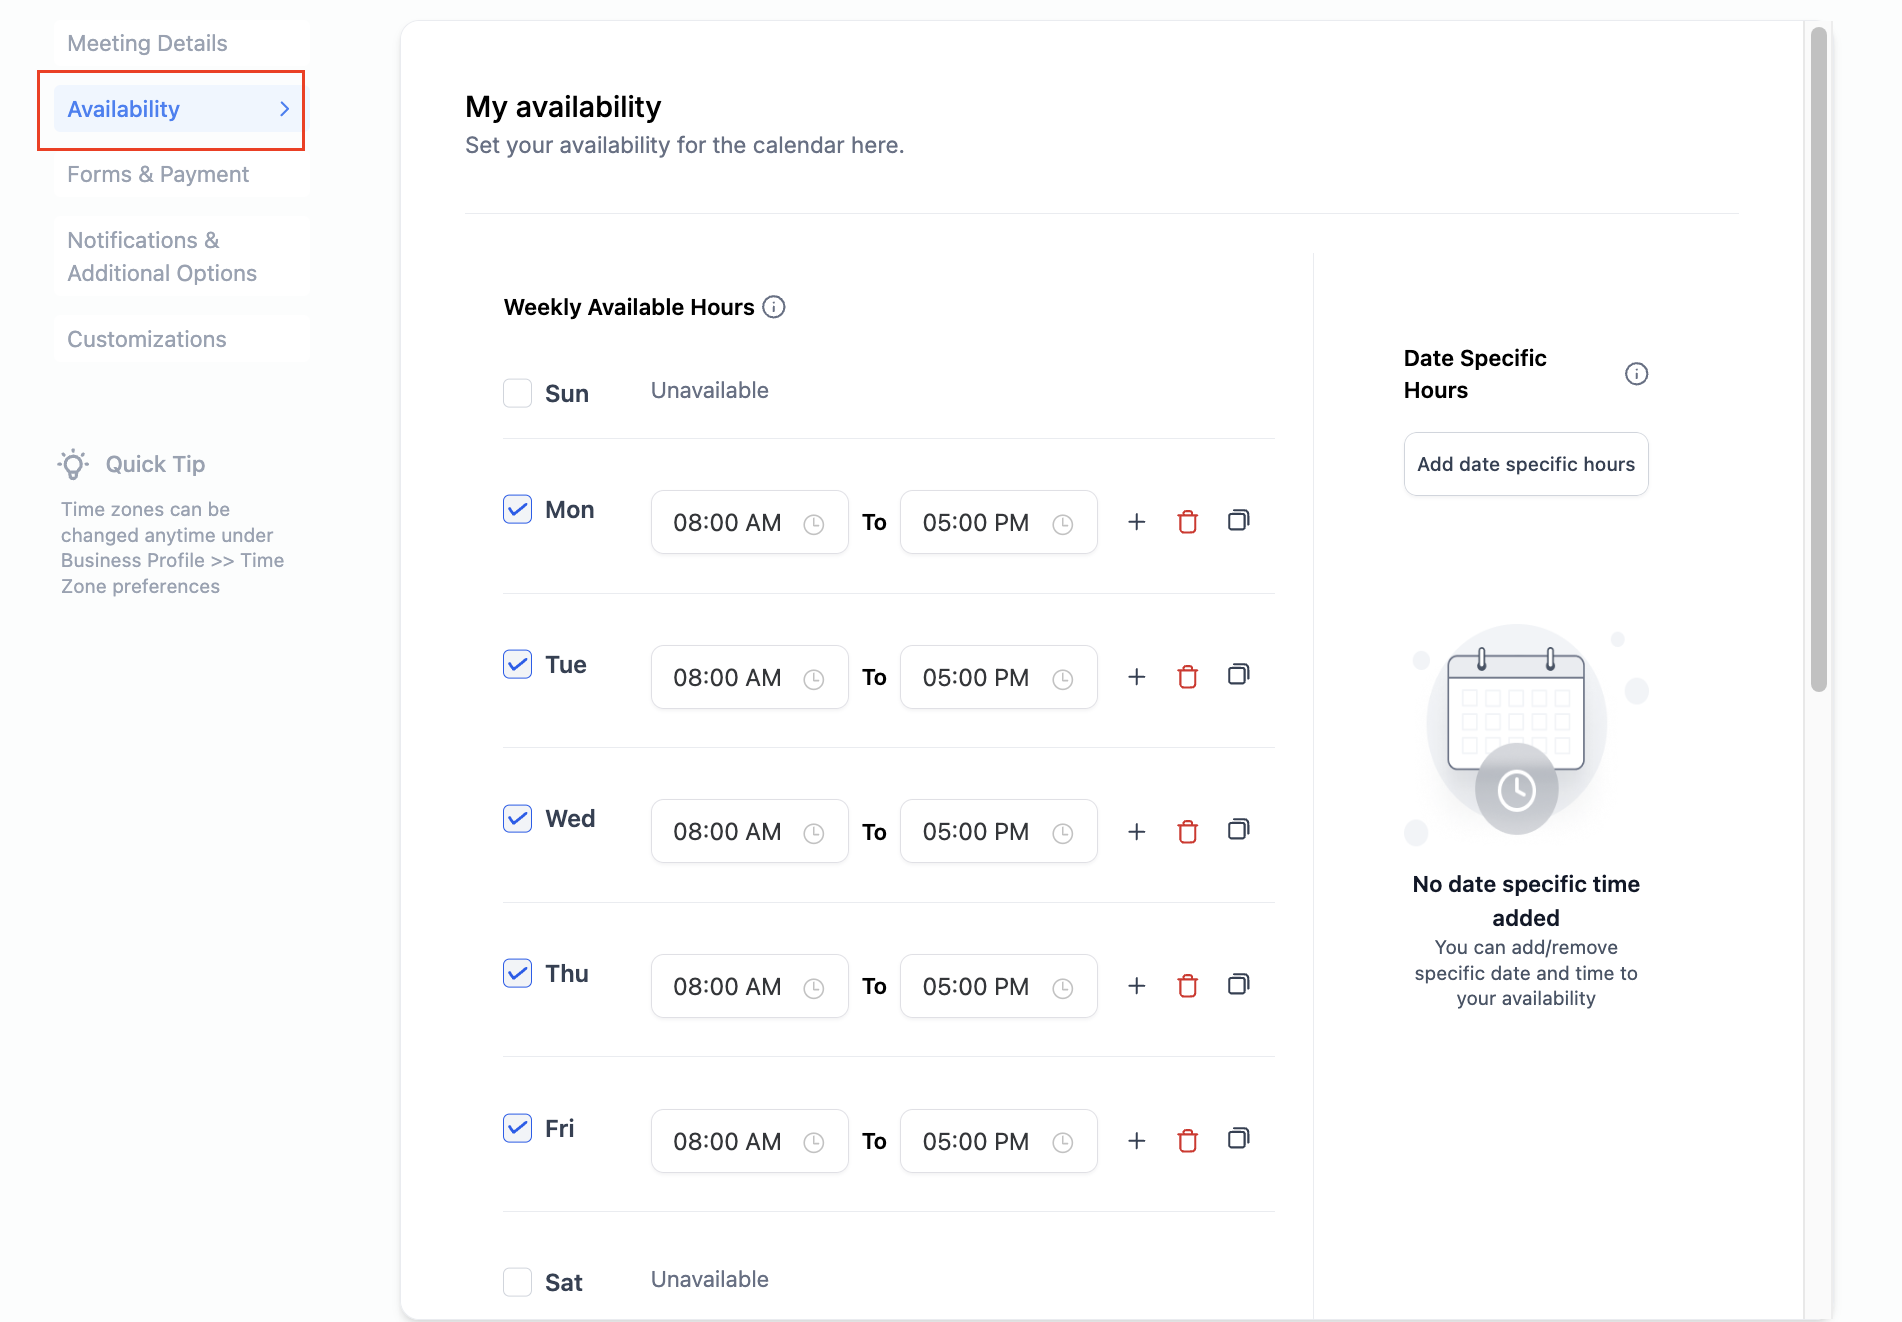
Optionally, enable Buffer Time to allow breaks between appointments.
Appointment Slot Duration: Select the duration of each appointment (e.g., 15, 30, or 60 minutes).
Max Appointments Per Day: Define the maximum number of bookings allowed per day to prevent overbooking.
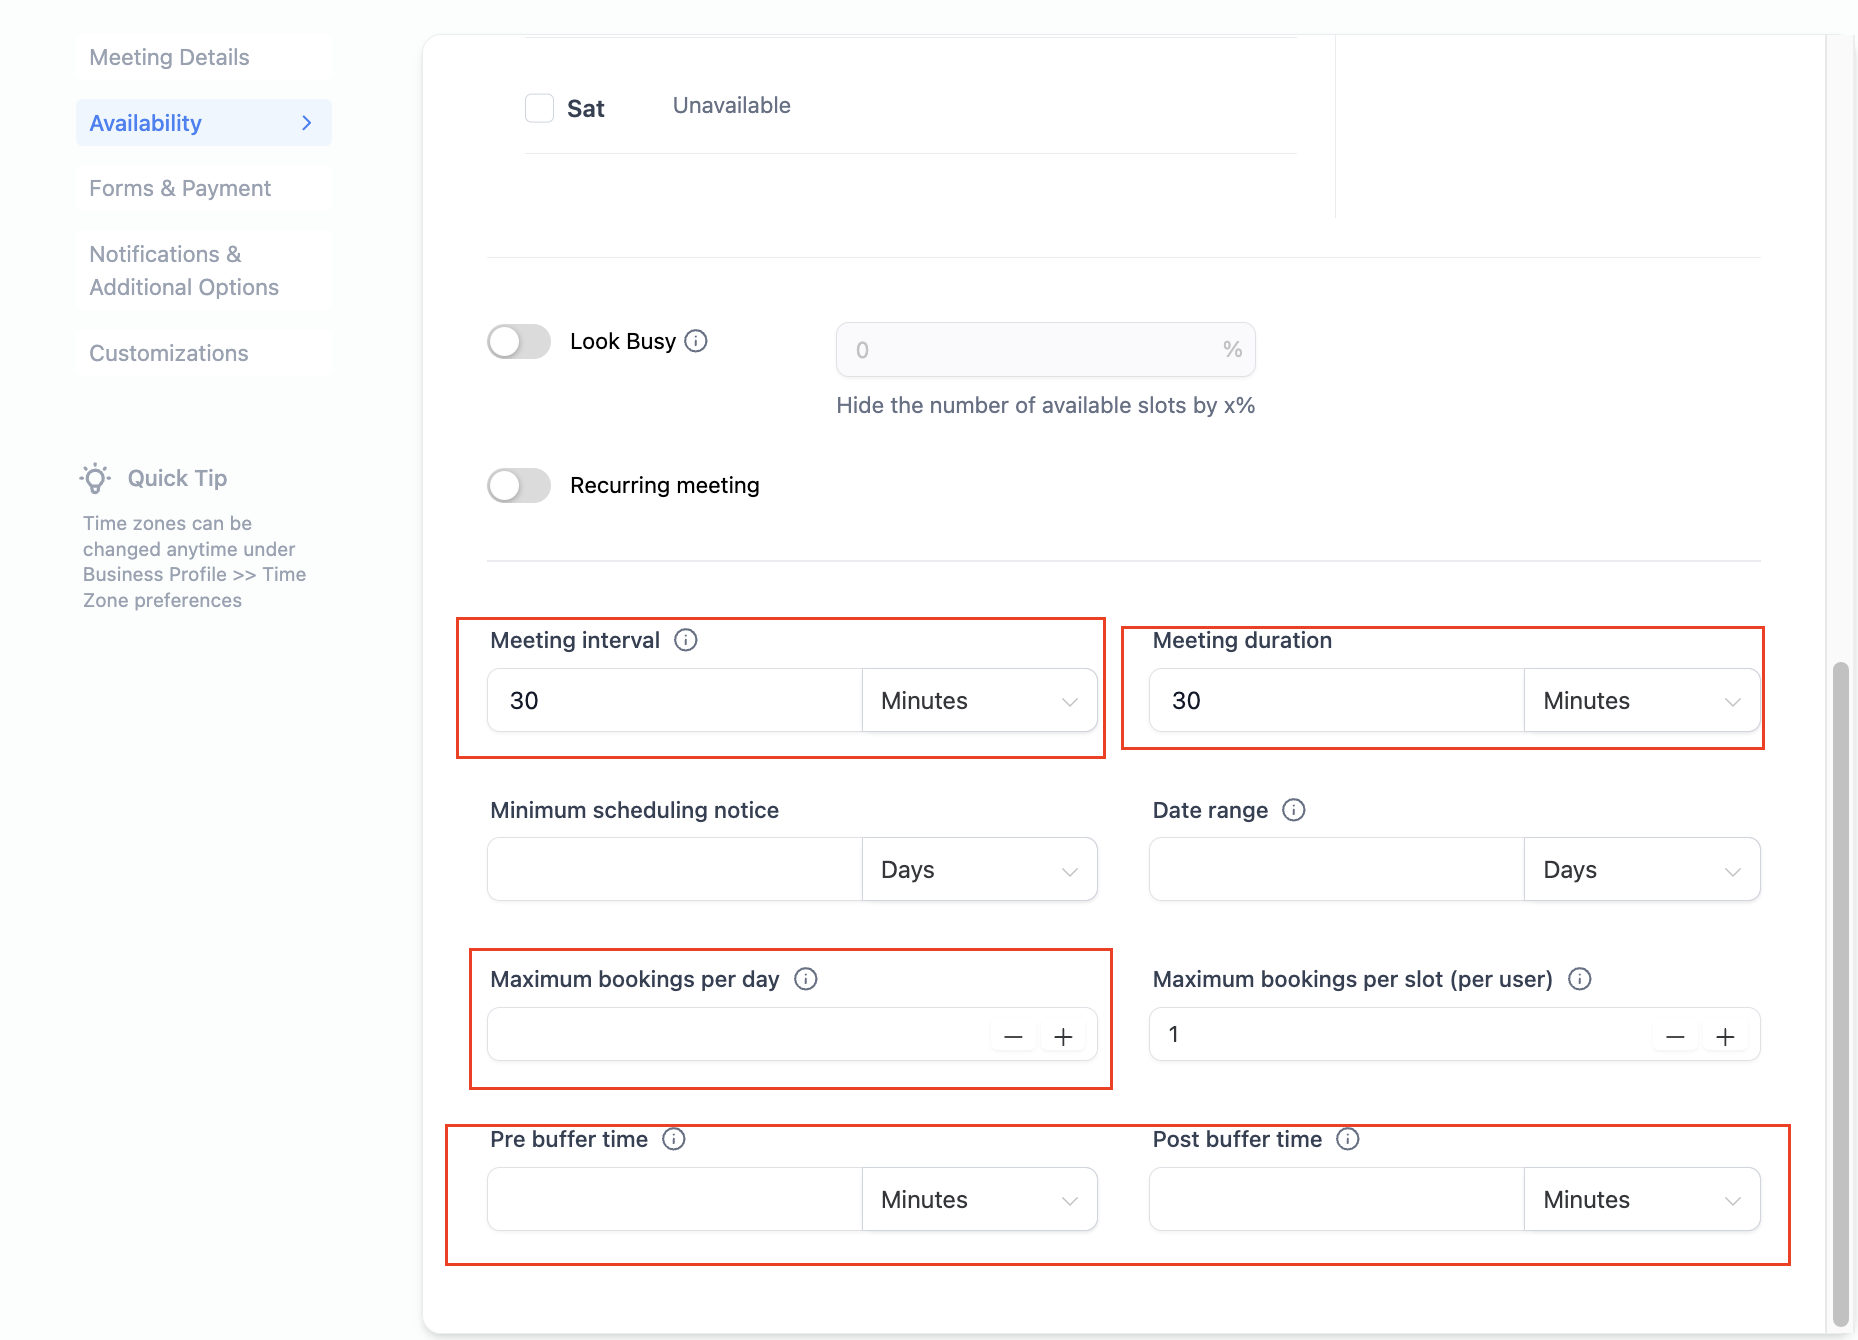
Hit Save.
Review your settings and click Save.
Activate the calendar by changing the status to “Active.”
Copy the Calendar Link: You’ll find a shareable link for the calendar on the settings page.
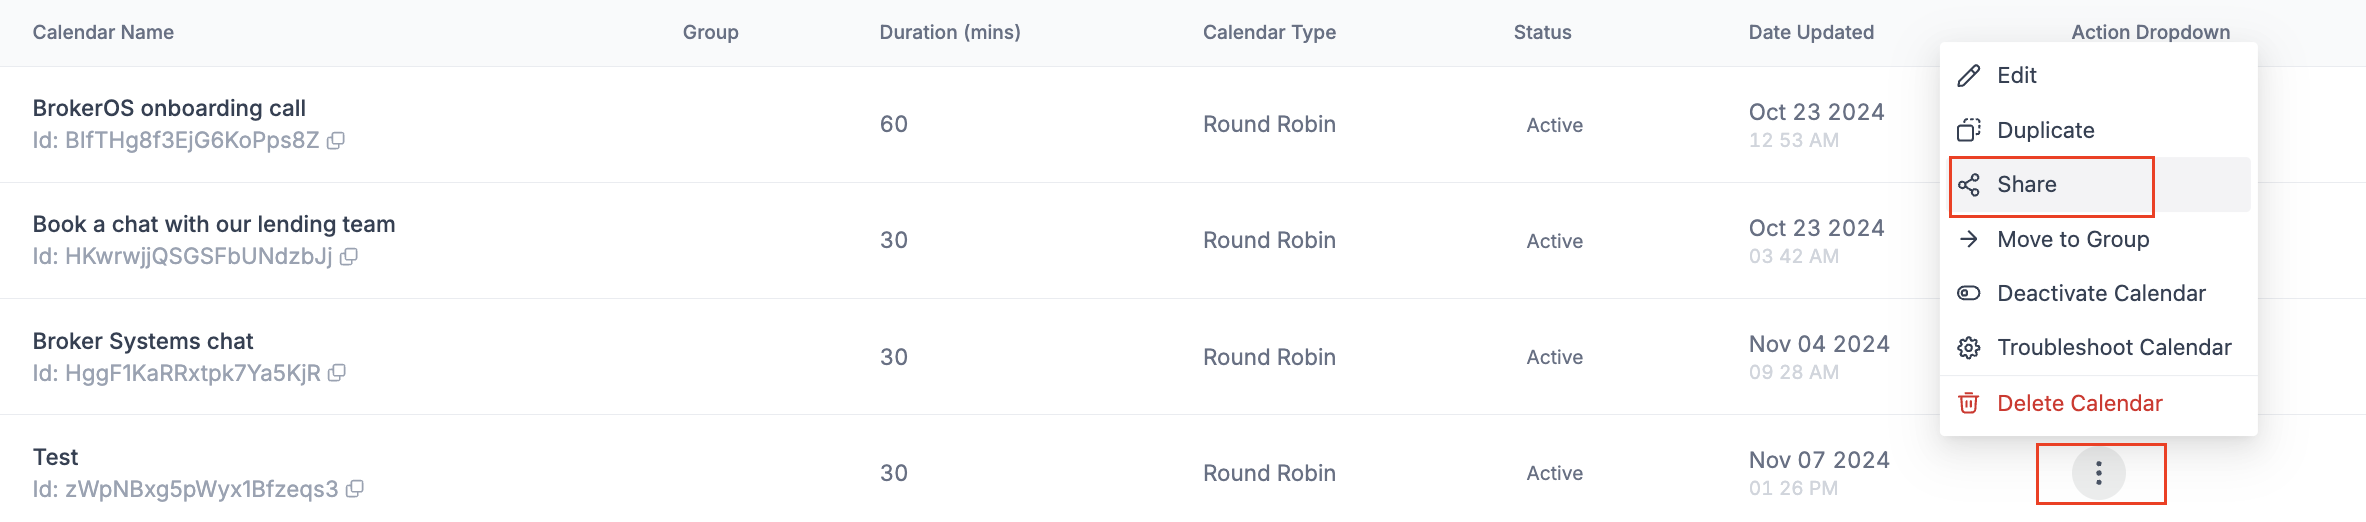
Share this link with clients via email, SMS, or embed it on your website for easy access.
Test the Booking Process: Book a test appointment to ensure that the calendar functions as expected.
Monitor Bookings: Regularly check your calendar dashboard to manage appointments and avoid conflicts.
Adjust Availability as needed based on demand and scheduling needs.